Image Classification using Convolutional Neural Networks in PyTorch
Part 5 of "PyTorch: Zero to GANs"
This post is the fifth in a series of tutorials on building deep learning models with PyTorch, an open source neural networks library. Check out the full series:
- PyTorch Basics: Tensors & Gradients
- Linear Regression & Gradient Descent
- Image Classfication using Logistic Regression
- Training Deep Neural Networks on a GPU
- Image Classification using Convolutional Neural Networks
- Data Augmentation, Regularization and ResNets
- Generating Images using Generative Adverserial Networks
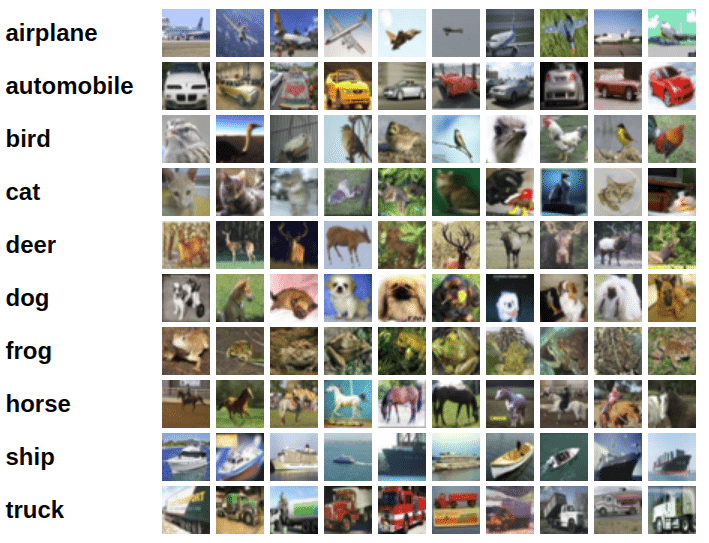
In the previous tutorial, we trained a feedfoward neural networks with a single hidden layer to classify handwritten digits from the MNIST dataset with over 97% accuracy. For this tutorial, we'll use the CIFAR10 dataset, which consists of 60000 32x32 px colour images in 10 classes. Here are some sample images from the dataset:
System Setup
This notebook is hosted on Jovian.ml, a platform for sharing data science projects. If you want to follow along and run the code as you read, you can choose the "Run on Kaggle" option from the "Run" dropdown above.
Otherwise, to run the code on your machine, you can clone the notebook, install the required dependencies using conda, and start Jupyter by running the following commands:
pip install jovian --upgrade           # Install the jovian library
jovian clone 05-cifar10-cnn            # Download notebook & dependencies
cd 05-cifar10-cnn                      # Enter the created directory
conda create -n 05-cifar10-cnn         # Create virtual env
conda activate 05-cifar10-cnn          # Activate virtual env
conda install jupyter                  # Install Jupyter
jupyter notebook                       # Start Jupyter
On older versions of conda, you might need to run source activate 05-cifar10-cnn to activate the environment. For a more detailed explanation of the above steps, check out the System setup section in the first notebook.
Before you start executing the code below, you may want to clear the cell outputs by selecting "Kernel > Restart and Clear Output" from the Jupyter notebook menu bar, to avoid confus
We begin by importing the required modules & libraries.
# Uncomment and run the commands below if imports fail
!conda install numpy pandas pytorch torchvision pytorch -y
!pip install matplotlib --upgrade --quiet
Collecting package metadata (current_repodata.json): done
Solving environment: done
## Package Plan ##
environment location: /opt/conda
added / updated specs:
- numpy
- pandas
- pytorch
- torchvision
The following packages will be downloaded:
package | build
---------------------------|-----------------
ca-certificates-2020.4.5.2 | hecda079_0 147 KB conda-forge
certifi-2020.4.5.2 | py37hc8dfbb8_0 152 KB conda-forge
numpy-1.18.5 | py37h8960a57_0 5.1 MB conda-forge
pandas-1.0.4 | py37h0da4684_0 10.1 MB conda-forge
------------------------------------------------------------
Total: 15.5 MB
The following packages will be UPDATED:
ca-certificates 2020.4.5.1-hecc5488_0 --> 2020.4.5.2-hecda079_0
certifi 2020.4.5.1-py37hc8dfbb8_0 --> 2020.4.5.2-py37hc8dfbb8_0
numpy 1.18.1-py37h8960a57_1 --> 1.18.5-py37h8960a57_0
pandas 1.0.3-py37h0da4684_1 --> 1.0.4-py37h0da4684_0
Downloading and Extracting Packages
numpy-1.18.5 | 5.1 MB | ##################################### | 100%
ca-certificates-2020 | 147 KB | ##################################### | 100%
pandas-1.0.4 | 10.1 MB | ##################################### | 100%
certifi-2020.4.5.2 | 152 KB | ##################################### | 100%
Preparing transaction: done
Verifying transaction: done
Executing transaction: done
import os
import torch
import torchvision
import tarfile
from torchvision.datasets.utils import download_url
from torch.utils.data import random_split